Cannoli Poke Cake

IMG_5174
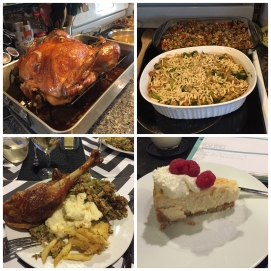
I think it’s easy to agree that finals suck. It doesn’t matter if you’re in high school, college, or grad school. Finals are awful and they bring out weird things in people. During this most recent round of finals, I wanted cannolis like you wouldn’t believe. So I started looking at the local Italian restaurants trying to find a place that had cannolis and preferably did takeout because I looked like a bum and going anywhere besides the law school or home looking the way I did wasn’t exactly “acceptable” or whatever. Turns out, there are NO restaurants that have cannolis on the menu. They all have tiramisu and spumoni ice cream, but no cannolis.

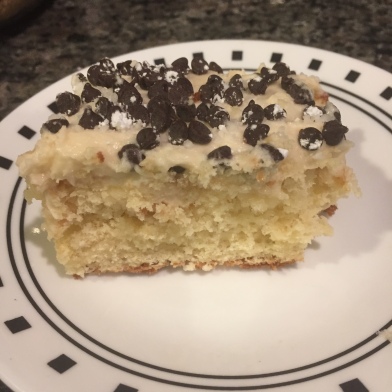
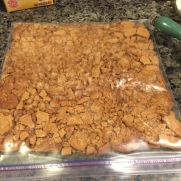
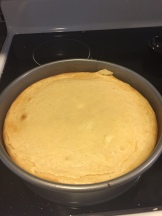
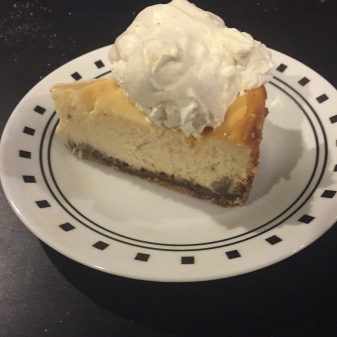
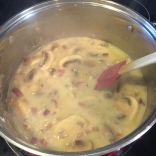
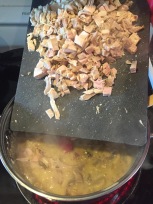
Again, with it being finals-season and not having the time to make actual cannolis, I decided to give this Cannoli Poke Cake recipe I found online a shot a shot and hope that it at least took the edge off my craving. Spoiler alert: they did. Since finals, I’ve made this cake two or three more times.

Cannoli Poke Cake

IMG_5118

Active/prep time: 10 minutes
Cook time: +/- 3 hours
Serves: 12+
Calories: I have no idea (ignorance is bliss)
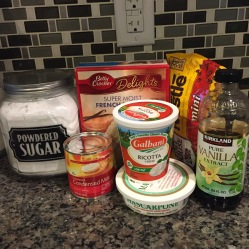
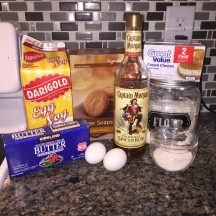
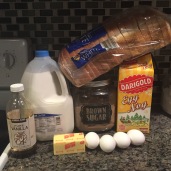
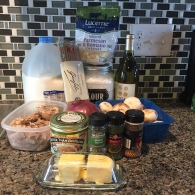


Ingredients

  • White or vanilla cake mix
    IMG_5114
  • 1 (14 oz.) can condensed milk, sweetened
    • reserving 3 tablespoons
  • 1 teaspoon vanilla extract
  • 1 cup mascarpone cheese
  • 1 ½ cup ricotta cheese
  • 1 cup powdered sugar + a little extra for garnishment
  • ½ cup mini chocolate chips

DirectionsIMG_5123

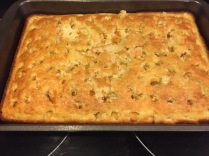
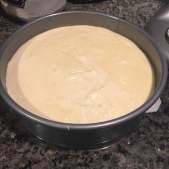
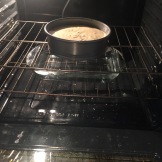
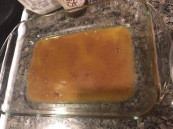
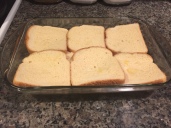
  • Bake the cake according on the directions on the box for a 9 x 13 pan
    • Allow to cool completely
  • Using the end of a wooden spoon, poke holes all over the cake
  • Reserve 3 tablespoons condensed milk, pour the IMG_5169remainder over the cakeRefrigerate the cake for 1-2 hours
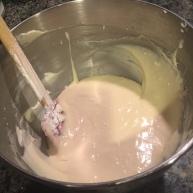
  • In a large bowl combine ricotta, mascarpone, and vanilla
  • Add powdered sugar and reserved condensed milk
    • Note: variances in consistency of the ricotta cheese may affect the thickness of the frosting – if it’s too thick add a little more condensed milk, if it’s too thin add a little more powdered sugar
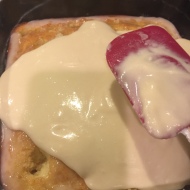
  • Remove cake from refrigerator and spread frosting over the top of the cake
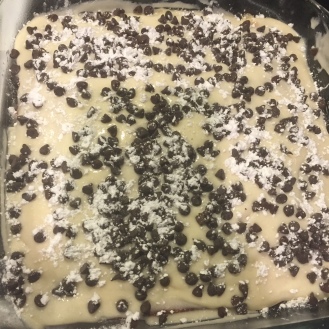
  • Spread chocolate chips and sprinkle powdered sugar on topIMG_5170
  • Cover and store in the fridge until ready to eat


IMG_5173IMG_5174


Signature

Spicy Thai Chicken & Noodles

The last few months have been crazy busy with school, finals, and more schoolwork. I’m so excited for a 3 month break from school. Granted, I’ll be working a couple of legal jobs, but at least I don’t have any tests or homework!

I love this recipe because it’s so fast, the leftovers are great for lunch the following day, and it’s delicious! I found the original recipe here, http://asmallsnippet.com/2011/03/spicy-thai-noodles.html several years ago when I was in college and I’ve made a few tweaks in attempt to make it a little healthier.

Enjoy!

Spicy Thai Chicken & Noodles

IMG_4164
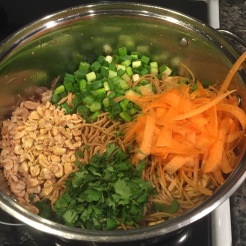
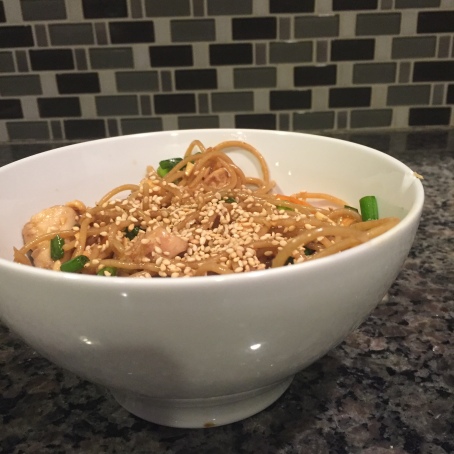
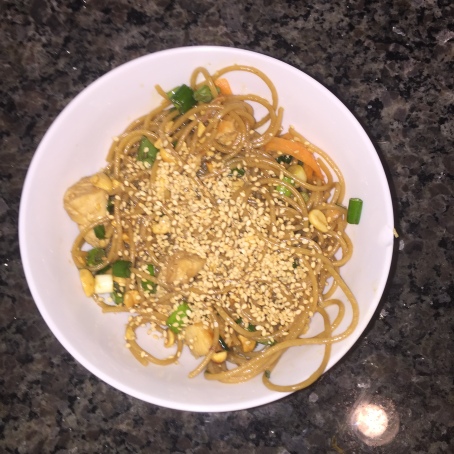
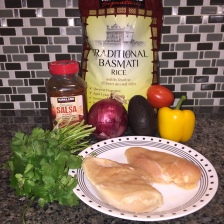
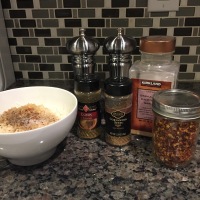
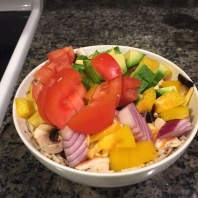
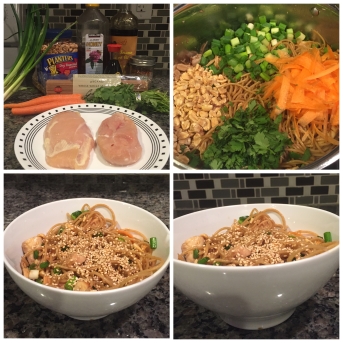
Active/prep time: 20 minutes | Cook time: 20-30 minutes | Serves: 6 | Calories: 300 per serving

Ingredients

  • 2 chicken breasts (baked or grilled, cut into pieces)IMG_4132
  • ½ package of a linguine or angel hair pasta (cooked)
  • ½-1 tablespoon crushed red peppers (use more or less depending on your preferable spice level)
  • 2 tablespoons olive oil
  • 2 tablespoons sesame seed oil
  • 3 tablespoons honey
  • 3 tablespoons soy sauce
  • ¼ cup green onions
  • 1 carrot peeled and shredded
  • ¼ cup cilantro
  • ½ cup peanuts
  • Optional: sesame seeds (for sprinkling on top)


DirectionIMG_4137

  • Prepare half a package of pasta according to their directions, drain and place in a large bowl
  • Bake or grill chicken breasts (I used a George Foreman grill)
    • Cut into pieces and place in large bowl with cooked pastaIMG_4140
  • Combine peppers, vegetable oil, and sesame seed oil in a pan and cook over medium heat for 2 minutes (careful not to let peppers burn!)Strain out pepper flakes, reserving the oil
  • Whisk together honey and soy sauce with reserved oil
    • Pour mixture on top of noodles/chicken and toss until well coated
  • Add cilantro, peanuts, and carrot to noodles and mix
  • Place green onions and sesame seeds on top of each bowl of noodles and serve!IMG_4145IMG_4147


IMG_4152IMG_4153

Signature

Chocolate Covered Bacon


Chocolate Covered Bacon

I apologize, it’s been a while since I’ve updated the blog, BUT I figured I’d come back with a bang and post one of my favorite recipes – chocolate covered bacon!

photo (3)
how young we were!

Going to the Puyallup Fair has been an annual tradition with my family since
can remember and it’s something I always looked forward to. I was stoked when I got to take Kenneth for the first time when he moved up a few years ago. One of the food stands offered all sorts of weird (fried) foods so we tried Rocky Mountain Oysters and chocolate covered bacon! The “oysters” weren’t disgusting, but they weren’t great either. It’s just an odd indescribable texture. I remember examining the bacon and thinking, “this doesn’t look hard.” So I did some googling and gave it a shot. It’s actually super easy and delicious. It’s a salty-chocolaty goodness and doesn’t taste like chocolate covered meat. It’s just delightful! The best part is even if they
don’t turn out pretty, it doesn’t matter because they’re DELICIOUS (and surprisingly easy to make).

Chocolate Covered Bacon

IMG_4079


IngredientsIMG_4065

  • Bacon (about 12 strips), uncooked
  • 1 ½ cups semisweet chocolate chips (may need more or less depending on how much chocolate you cover the bacon with)

White chocolate drizzle (optional)

  • ¼ cup white chocolate chips
  • 1 tablespoon coconut or vegetable oil

DirectionsIMG_4068

  • Preheat oven to 400 degrees
  • Place a cooling rack inside a lipped cookie sheet (jelly roll pan)
  • Rinse the bacon under cold water for a few seconds and pat dry
    • (This helps prevent shrinkage while baking)
  • Place the bacon on the rack, bake for 10-12 minutes (You’ll
    want it somewhere between soft and crunchy)IMG_4081
  • Cool bacon and pat off excess oil with paper towels and cut strips into thirds
  • Melt chocolate chips until smooth
  • Place parchment paper on a baking sheet
  • Using a fork (or your fingers if you want to get messy) dip the bacon in the chocolate until covered and carefully set onto the parchment surface
    • Continue until all bacon is used (you may need to melt IMG_4082
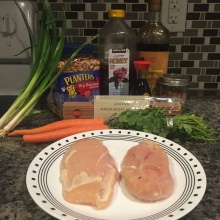
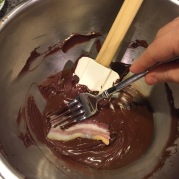
additional chocolate)
  • Place bacon in refrigerator until hardened (about 30-45 minutes)
  • Melt white chocolate chips and oil in microwave-safe bowl in 30-second intervals
    until smooth, pour into a small plastic bag (I used a small Ziplock bag) and cut a small hole in a corner
  • Drizzle white chocolate over bacon, place back into fridge until completely set
    • Store bacon in an airtight container in the refrigerator
      for up to 5 days


IMG_4083

IMG_1145 - Copy


Signature

Quick & Easy Mexican Rice Bowl

Currently, it is the last weekend of winter break, so I’m hitting the books diligently working on first day assignments. Un/fortunately, my break ended early thanks to moot court – this is my researching break. It’s fun and interesting, but very time intensive. That being said I am going to post recipes every other week so I can give my school work the attention it deserves requires. With my break at its end and homework already piling up, I decided to make this yummy, quick, and easy rice bowl.

I started making this recipe my sophomore year of college. It was the first year I was “on my own” (not living with parentals and not living in dorms) and I started throwing stuff together for a quick and easy meal and soon stumbled onto this gem. I used to make this with Minute Rice so it didn’t require any oversight and it only took a few minutes to cook. I know, Minute Rice is gross and has no nutritional value – hindsight is 20/20! Also I was like 19 years old, so can I use the young and dumb card?

This recipe has grown up in recent years (as in I now use Jasmine rice!) and is still one of my favorites for a quick meal that can cook while I read or research for classes. Even Kenneth, my weird husband who dislikes Mexican food will eat this without complaint (he does his sans cheddar). There isn’t a “wrong” way to do this, it’s basically whatever ingredients you like. I usually have most of the ingredients on hand so tossing this together is quick and easy.

IMG_4120

Quick & Easy Mexican Rice Bowl

Active/prep time: 10 minutes | Cook time: 20-30 minutes | Serves: 2 people | Calories: 460 per servingIMG_4114

Ingredients

  • 2 chicken breasts (grilled or baked)
  • 2 cup rice, cooked (I like Jasmine rice, but you can use brown or whatever you prefer)
  • ½ avocado, diced
  • 1 tomato, diced
  • ¼ onion, diced
  • ½ a bell pepper (any color)
  • ½-1 cup salsa (depending on your preference)
  • ¼ cup cheddar cheeseIMG_4116
  • Salt & pepper (to taste)
  • Garlic powder or salt (to taste)
  • Cumin (optional, to taste)
  • Coriander (optional, to taste)
  • Crushed red pepper flakes (optional, to taste)
  • ¼ cup cilantro, chopped (optional)
  • 2 mushrooms, sliced (optional)

Directions

  • Cook rice according to the directions on the package, while rice is IMG_4117
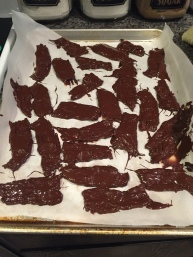
cooking grill or bake chicken (I prefer to use a George Foreman)
  • Dice and chop the avocado, tomato,
    onion, bell pepper, (optional) cilantro and
    mushrooms
  • Place 1 cup cooked rice in each bowl and sprinkle spices on top and stir until combined
  • Place chicken and cheddar on the
    seasoned rice (I like to give the cheese a chance to melt)
  • Divide the vegetables among the bowls, pour salsa over each, and serve!


IMG_4119

IMG_4120

IMG_4122

IMG_4121

Enjoy my friends!

Signature

Eggnog Cheesecake with a Gingersnap Crust

Post 2/2!

Eggnog Cheesecake with a Gingersnap Crust

Ingredients

Gingersnap Crust

  • 2 cups gingersnap cookie crumbs
  • 7 tablespoons melted butter

Eggnog Cheesecake with a Gingersnap Crust

IngredientsIMG_3953

Gingersnap Crust

  • 2 cups gingersnap cookie crumbs
  • 2 tablespoons white sugar
  • 5 tablespoons butter, melted

Eggnog Cheesecake

  • 24 ounces (3 packages) cream cheese, softenedIMG_3954
  • 1 cup white sugar
  • 3 tablespoons all-purpose flour
  • 2 eggs
  • ¾ cup eggnog
  • ½ teaspoon rum (or rum extract…whatever you have on hand J)
  • Pinch of ground nutmeg, to taste
  • Pinch of salt, to taste

Directions

Gingersnap Crust

  • Preheat oven to 325 degrees
  • Line the bottom of your springform pan with parchment paper and spray the sides of the pan with non-stick cooking spray
  • In a small bowl, combine gingersnaps, sugar, and butter, press into bottom of the pan
    • TIP: I like to use the bottom of a drinking glass to help press crumbs to the bottom and sides of the pan
  • Bake for 15 minutes, allow to coolIMG_3957
    • TIP: Keep the oven on, you’ll bake the cheesecake at this temperature!

Eggnog Cheesecake

  • In a large bowl, mix cream cheese, sugar, and flour until smooth and creamy
  • Stir in eggnog, rum [extract], nutmeg, and salt until combinedIMG_3958
  • Add flour and sugar, mix until smooth
  • Add eggs one at a time
    • TIP: be careful not to overbeat the batter once the eggs have been incorporated, this can cause the cake to puff and crack
      during baking
  • Pour filling evenly over crustIMG_3959
  • Place pan with 1” water in the center of the bottom rack, add springform pan to top/upper rack in the center (the water helps prevent the cheesecake from cracking)
  • Bake at 325 degrees for 45-50 minutes (depending on your oven – mine took about an hour and ten minutes to bake) or until the center jiggles like Jell-O when touched
  • Cool on a wire rack and refrigerate for 4-6 hours
  • Optional: homemade spiced whipping cream
    • Pour 3/4 cup heavy whipping cream with 2 tablespoons powdered sugar and a couple dashes of nutmeg and ground cloves into a bowl and use an electric mixer or Kitchen-Aid to beat until stiff peaks form

IMG_3994IMG_3996

IMG_3995

IMG_4002

Signature


Eggnog French Toast Casserole

Woo! I survived finals and assuming nothing catastrophic happened over those awful days I am officially half way through law school! After a hectic post-finals weekend and a whole lot of sleep I am back for some yummy treats!

I’ve been on an eggnog kick since finishing finals. Eggnog lattes, eggnog cookies, eggnog from the carton…you get the picture. My relationship with eggnog is a love-hate relationship because it’s seasonal and fattening, but it’s also why I adore the stuff. While I love the ‘nog Kenneth hates it with a capital ‘H’. Over the years I’ve discovered that most people who “dislike” eggnog just don’t like it straight (or in latte form), but they’ll happily eat cookies, cupcakes, etc. that are eggnog flavored. That being said, the majority of the eggnog cookies I made at the beginning of finals may or may not have been devoured by a guilty husband.

I make a decent amount of cheesecakes, so I tried “winging” my eggnog cheesecake recipe and to my surprise it turned out great! It cracked just a little, but it’s not the end of the world. I modified a French toast casserole recipe I stumbled upon on Pinterest and turned regular French toast into holiday-French toast. Here is the original recipe – it’s perfect for a lazy weekend.

Side note, here are a couple pictures of my Christmas dinner:

IMG_3998

Sorry, not sorry, it was amazing

Eggnog French Toast Casserole

IngredientIMG_3966.JPG

  • ½ cup melted butter (1 stick)
  • 1 cup brown sugar
  • 1 loaf white bread (I used 2/3s of a loaf)
  • 4 eggs
  • ¾ cup eggnog
  • ¾ cup milk
  • 1 teaspoon vanilla
  • Powdered sugar (toIMG_3963 sprinkle)
  • Maple syrup (to drizzle when serving)


DirectionsIMG_3964

  • Mix together brown sugar and melted butter
    • Pour mixture into bottom of 9×13 pan
  • Lay a single layer of white bread in the pan
  • Beat eggs, milk, and vanilla and spoon ½ of the egg mixture on bread
  • Add a second layer of bread and spoon the remaining egg mixtureIMG_3967
  • Cover and chill in fridge overnight
  • Bake at 350 degrees for 45 minutes (covered the first 30 minutes, uncovered the last 15)
  • Sprinkle with powder sugar and serve with maple syrup
    • I served the French toast with bacon and a Poinsettia mimosa (cranberry juice + champagne)

IMG_3972


IMG_3973


IMG_3975


Enjoy!

Signature

Turkey Tetrazzini

I hope everyone had a great Thanksgiving! This was my first year hosting thanksgiving and I was pleasantly surprised how well it went!

IMG_3733

With finals, papers, and general school stuff all coming due in the next couple weeks this will be my last post until Christmas and the stress of law school blows over temporarily. I am planning to post a delicious recipe for frosted egg nog cookies – even if you dislike egg nog as a drink, the cookies are amazing and full of spice, so give it a shot before you ignore it 😉

I figured with Turkey Day being last week and most people still working on leftovers that it was appropriate to post my mom’s family recipe for Turkey Tetrazzini. It’s a fantastic way to use a bunch of leftovers without resorting to eating Thanksgiving leftovers or turkey sandwiches for 3 days after Thanksgiving. I haven’t been the biggest fan of traditional Thanksgiving food, but I’ve always looked forward to tetrazzini, it was one of those recipes made a handful of times per year.

I cut the following recipe in half, the recipe my mom sent me seemed like a LOT of food for just the two of us, she said it would serve 6-8 people. Even after cutting it in half I filled a 9×13 pan and we’re on day 3 of tetrazzini leftovers for dinner, so if you’re only feeding a couple people it might be good to cut the following in half.

Turkey Tetrazzini

Ingredients

  • ½ pound spaghetti noodles
  • 3 tablespoons butter
  • ½ cup plain Panko breadcrumbs
  • 1 cup Parmesan cheese

    image1
    Not pictured: garlic and red peppers
  • ¼ cup parsley
  • ½ pound mushrooms, sliced
  • ½ an onion, chopped
  • 4 cloves garlic, crushed
  • 1 tablespoon thyme
  • ¼ teaspoon nutmeg
  • ¼ cup all-purpose flour
  • ¼ cup white wine
  • 2 cups chicken stock
  • ¼ cup milk
  • 2 cups turkey or chicken – cooked, boneless, chopped into 1” pieces
  • Salt and pepper, to taste
  • ½ teaspoon crushed red peppers (optional)

Directionsimage4

  • Pre-heat oven to 350 degrees, spray a 9×13 casserole dish with non-stick spray
  • Follow the directions for your spaghetti, drain and set aside
    • You’ll want to cook until its al denteimage6
  • Melt 1 tablespoon butter and combine in a small bowl with breadcrumbs, parsley, and ¼ cup
    Parmesan cheese
  • Heat remaining 2 tablespoons butter and crushed garlic in your now-empty pasta pot
    • Add mushrooms and sauté until softimage8
    • Add onion and cook until translucent
    • Add thyme and nutmeg
  • Add flour and stir until combined and coated
  • Add wine and increase heat to high and bring
    mixture to a boil (until liquid is reduced)
  • Add chicken stock and milk, stir to combineimage9
  • Reduce heat to simmer and add remaining ¾ cup Parmesan cheese and stir to combine
  • Pour cooked spaghetti into mushroom mixture, add turkey and stir to combine
    • Add salt, pepper, and (optional) red peppers to taste
  • While still hot, pour mixture into the casserole dish, sprinkle with reserved breadcrumb mixture and bake for 15 minutes, until bubbly and the top is golden brownimage10
    • Allow a few minutes for the casserole to cool before serving

image11

IMG_3725

IMG_3723

Enjoy your leftovers my friends!

Coconut Chicken with Peach Honey Mustard Sauce

Our area got hit pretty hard last week with a windstorm. We were incredibly lucky, maintaining power through the entire ordeal, only losing internet, and school being cancelled for one day. The internet being down put the kibosh on research in the evenings so we’ve been killing time with Redbox movies.

I decided to make this yummy recipe since the storm knocked out the internet so I had some extra time to cook since no internet means no researching for classes or law review.

Kenneth has teased me for years that my dinners consist of some variation of chicken and rice. This recipe is no different, but it is delicious!

There are a couple of different ways to make this recipe, this is the healthier of the two options. The oth
er option involves frying the chicken after it is breaded until golden brown and then baking for 15 minutes at 350 degrees. Delicious, but unnecessary calories. You can use a couple of different dipping sauces, I’ve included the recipe for this tasty peach honey mustard sauce, but we also enjoy using a sweet chili sauce from time to time.

Coconut Chicken with Peach Honey Mustard Sauce

Coconut Chicken

Ingredients

  • 3 boneless skinless chicken breasts
  • ¼ cup flour
  • 1/3 cup water
  • Salt and pepper to taste
  • 1 cup shredded coconut (may need additional depending on the size of the chicken breasts)
  • 1 cup Panko bread crumbs (may need additional depending on the size of the chicken breasts)image1

 Directions

  • Preheat the oven to 350 degrees
  • Slice the chicken lengthwise into thin strips
  • In a small bowl whisk flour, water, salt, and pepper together
  • In a separate bowl mix the bread crumbs and the coconimage2ut together
  • Working in small batches, place the chicken in the flour mixture until well coated
  • Transfer the chicken into the coconut-bread crumbs and mix well
  • Place chicken on a baking sheet
    • I use a cooling rack to help heat circulate better and so the bottom doesn’t get mushy
  • Bake for 30-40 minutes until chicken is no longer pink
  • While chicken is baking start the peach honey mustard sauceimage3

 Peach Honey Mustard Sauce

Ingredients

    • 1 cup peach slices
      • Frozen peach slices or one whole peach if you have one handy
    • ¼ cup Dijon mustard

image4

Directions

  • Place peaches, honey, and mustard in a blender and blend well
  • Pour sauce into ramekins or small bowls for dipping

    Serve with rice, peach honey mustard and/or sweet chili sauce and enjoy!

Oven-Roasted Chicken Shawarma and Basmati Rice Pilaf

This last weekend has been chilly, windy, and stormy. A perfect time for some comfort food and what’s better than chicken and rice? How about an Afghan twist on chicken and rice!

In addition to this very flavorful and yummy dish, I also sliced and baked an eggplant, zucchini, and yellow squash for a side veggie. I omitted several things from the original recipe, such as raisins and nuts in the pilaf. You can access the chicken shwarma, here and the basmati rice here.

Oven-Roasted Chicken Shawarma and Basmati Rice Pilaf

Chicken Shawarma

Ingredients

  • 2 lemons, juiced
  • ½cup plus 1 tablespoon olive oil
  • 6 cloves garlic, peeled, smashed and minced
  • 1 teaspoon kosher salt
  • 2 teaspoons freshly ground black pepper
  • 2 teaspoons ground cumin
  • 2 teaspoons paprika
  • ½ teaspoon turmeric
  • A pinch ground cinnamon
  • Red-pepper flakes, to taste
  • 2 pounds chicken (I used boneless, skinless breasts)
  • 2 tablespoons chopped fresh parsley and/or cilantro

Directions

  • Prepare a marinade for the chicken
  • Combine the lemon juice, 1/2 cup olive oil, garlic, salt, pepper, cumin, paprika, turmeric, cinnamon and red-pepper flakes in a large bowl, then whisk to combine. Add the chicken, and toss well to coat. Cover, and store in refrigerator for at least 1 hour and up to 12 hours
    • Cooking tip: I marinated the chicken for about 24 hours and it perfectly fine – I’d recommend marinating it for more than 12 hours because the lemon juices soften the chicken so it’s really tender
  • Remove the chicken and onion from the marinade, and place in baking dish, spreading everything evenly across it.
  • Put the chicken in the oven, and roast until it is browned, crisp at the edges and cooked through, about 30 to 40 minutes
  • Remove from the oven, allow to rest 2 minutes
    • Slice into bits

 Basmati Rice

Ingredients

  • 1-1/2 cups Basmati rice
  • 3 tablespoons unsalted butter
  • 1/2 cup finely chopped yellow onions, from one small onion
  • 1/2 teaspoon cumin
  • 1/2 teaspoon ground turmeric
  • 1/4 teaspoon cinnamon
  • 2 cloves garlic, minced
  • 2-1/4 cups water
  • 1-1/4 teaspoon salt
  • 1/4 teaspoon freshly ground black pepper

Directions

  • Place rice in medium bowl and add enough water to cover by 2 inches. Using your hands, gently swish grains to release any excess starch
  • Carefully pour off water, leaving rice in bowl
    • Repeat four to five times, until water runs almost clear. Using a fine mesh strainer, drain water from rice. Place strainer over bowl and set aside
  • Melt butter in a pot over medium-low heat
    • Add onions and cook, stirring regularly, until softened but not browned, about 4 minutes
    • Add cumin, turmeric, cinnamon, and garlic to sautéed onions and cook until fragrant, about 30 seconds longer
  • Add rice to pot, and cook, stirring constantly, for about 3 minutes. Add water, salt and pepper to rice and return to a boil